Tips for Maintaining Your Titan Rentspray 400 Paint Sprayer

Posted 12 months ago
Titan Rentspray 400

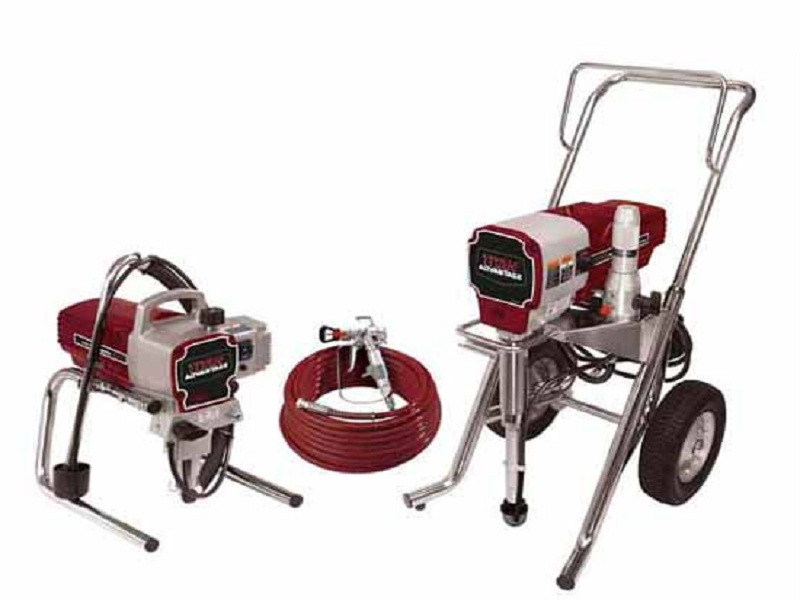
Investing in efficient and high-quality paint sprayers like Titan rentspray 400, can definitely level up your painting projects. Titan rentspray sprayer series are versatile, proficient, and capable of conducting both commercial, residential, and DIY touch-ups. To ensure the longevity, performance, and optimal functioning of the Titan Rentspray 400, it’s important to work on its maintenance. We will share some of the most effective, but simple steps to maintain your paint sprayer. Let’s see, how to get the most out of your Titan rentspray 400;

Go Through the User Manual

User manual is a set of information shared by the manufacturer showing the parts, features, operating system, and maintenance guidelines of the particular sprayer. This manual will not only help you in using your machine properly, but the maintenance guidelines recommended by the manufacturer will allow you to clean your sprayer in the right way.

Thorough Cleaning After Every Use

Cleaning after every use is a strict practice recommend by all the manufacturers. A thorough cleaning after every use saves your sprayer from buildup and clogging, protecting the inner parts and their performance.

Start your cleaning process by emptying the paint container to remove paint that you’re not going to spray. now clean each and every part; from nozzles to tips, filters, hoses, everything on your spray gun. Do not forget to use the solvent or cleaning solution recommended by Titan to clean every component of your Titan Rentspray 400.

While cleaning, you’d need to pay full attention to all the parts, check if your have removed all the excess paint and debris from the sprayer body. The cleaning continues until every single part of your paint sprayer gun is free of paint, dirt, and debris.

Check for Filter Replacements

Inspect your filters before and after every use. Not everything on your paint sprayer needs frequent replacement, but unfortunately filters are an exception. So, filter inspection is an important step in your paint sprayer maintenance routine.

Follow the guidelines shared by the manufacturers on the user manual to effectively clean and replace your filters. Why is so important to clean and replace filters every now and then? Clogged filters hinder the normal flow of paint, and ultimately an uneven paint flow leads to uneven spray patterns leaving textured surfaces, snatching their smooth glass-like appearance.

So, it’s highly-recommend to frequently inspect your filters for the optimal performance of your paint sprayers.

Moving Parts Need Lubrication

Moving parts need lubrication for smooth functioning, as recommended by the manufacturers for the enhanced functioning of your paint sprayer. Friction is produce by the movement of the parts, lubricating them properly adds to the longevity of the sprayer as well as enhances the performance of your sprayer.

Paint sprayer parts like piston, trigger, and needles need small amounts of lubrication every now and then. It is recommend to lubricate these parts to reduce the risk of wear and tear and to extend the lifespan of your sprayer.

Inspect and Replace Worn Parts

It’s better to keep replacing the damaged parts than to replace the sprayer. Regular inspection of the parts for the signs of wear and tear is a crucial step in the maintenance of the paint sprayers. Damaged parts are replaced with the genuine parts from the trusted brands like Titan to ensure the efficacy and longevity of the machine.

Wear and tears lead to leakages, leading to wastage of paint and surfacing potential issues in your paint projects. You can use the manufacturers’ guidelines to easily replace the damaged parts at home without getting professional help. Carefully read all the replacement instructions given on the manual to successfully replace worn out parts of your gun.

Proper Storage of Your Titan Rentspray 400 is Essential

When not in use, the paint sprayer must be cleaned, dried, and store in a proper place, so that the next time you use it, your sprayer is as functional as a brand-new sprayer. After cleaning or washing your paint sprayer, dry all the parts using a cloth or a towel.

Store your sprayer in a cool and dry place, away from direct sunlight, exposing your paint sprayer to direct sunlight and extreme temperatures can damage the body of the sprayer and the parts may no longer be able to perform the job required of them.

Regular Maintenance is the Key!

Cleaning and inspection of your paint sprayer are not the only maintenance techniques. Schedule servicing of your paint sprayers, where experienced technicians inspect your sprayer thoroughly. You might not have all the necessary tools to clean your sprayer, so a thorough cleaning at the hands of professionals must be a part of the maintenance routine of your Titan Rentspray 400 to keep it going.

Conclusion:

Maintenance is the key to enhance the proficiency and prolong the lifespan of your paint sprayer. Regular inspection of all the parts, thorough cleaning after every use, and frequent replacements of the worn-out parts is all that is required to keep your Titan Rentspray 400 in excellent shape!

Step-By-Step Guide to Using Kremlin Paint Gun for Beginners

Posted 12 months ago
Kremlin paint gun

Kremlin paint sprayer guns are a popular choice to get started with your painting ventures. It is a versatile, durable, and efficient machine. It has received immense admiration from both professional painters and beginners who are just starting. Kremlin paint gun is not a complex machine, and no qualification is required to bring it into use. If you are new to painting, it’s best to start with a simple guide to get to know your machine and its working.

Let’s start our step-by-step guide on using the Kremlin paint sprayer gun, and all the tips and tricks you need to know to bring it into functioning;

Start with Assembling Your Gun

Start with assembling your Kremlin sprayer gun. You’d want to carefully go through the manufacturer’s instructions that come in a manual along with the gun. Assembling the gun is not difficult, especially if you carefully examine all the parts of your gun and attach them correctly.

The gun handle needs to get attached to the main body. All the fittings must be tightened to secure the connections.

Preparation of the Paint

The second step is to prepare the paint. Carefully read the manufacturers’ instructions on how to mix the paint, you have to know the ratio of the paint thinner as well as the type of thinner recommended for the gun.

The preparation of paint does not end on mixing the paint with the right thinner, the final step is to free the mixture from any impurities. A mesh filter or a paint strainer is usually used to strain the paint. It is a crucial step, the impurities that remain in the paint might clog the filter or the nozzle of your gun, resulting in problems every painter discourages.

Adjust the Settings of Your Sprayer

Once your gun is assembled and the paint is prepared, the next step is to adjust your gun and customize it for the job required of it. The common settings that you need to look into are; pressure adjustment, flow rate, and spraying pattern.

Read the manufacturers’ instructions carefully to know the Sprayer parts that require adjustment along with the right procedure. Pressure is adjusted via the pressure regulator present on the gun, adjust it to the recommended levels.

The fluid flow rate or paint flow rate is adjusted via the fluid control knob present on your sprayer. It allows you to control the flow of the fluid. It is a great feature, especially for beginners, as they have little to no experience in controlling the speed at which their fluid flows. It’s easier to adjust it from the sprayer than learning it via experience.

Finally, the spraying pattern can be adjusted to your desired shape and size. Hence, the Kremlin paint sprayer allows full control over your gun, making your painting experience efficient and smooth.

Test Your Gun, and Start Spraying

Testing your sprayer on rough cardboard before you start at your targeted surface is important. It will allow you to check the pressure and the flow rate of your gun, which can then be adjusted as per the need. In addition to the flow rate, check the consistency of the paint and how it appears on the surface.

Once you have tested your paint gun on scrap material, it’s time you start spraying. Get a firm grip on your gun and keep it 6-8 inches away from the surface. Start spraying, and move your gun back and forth overlapping each stroke.

You’d want to keep your gun at a consistent speed and distance to generate uniform strokes of paint on the wall. It saves you from over-layering of paint and ultimately paint wastage.

Another important thing is the angle at which you hold your gun. For walls and flat surfaces, hold the gun at 90 degrees or perpendicular to the surface, for the corners and curves however, adjust it according to the shape of the surface.

Clean Your Sprayer Once You’re Done

Cleaning the sprayer right after every use is important for the longevity, functioning, and performance of your paint sprayer. Cleaning it thoroughly with water is important to prepare it for the next use. If you do not properly clean your sprayer gun after every use, it might affect the performance of your sprayer due to clogs.

A thorough cleaning requires dissembling the spray gun and washing every part with a sufficient amount of water. After rinsing with water, dry it with a towel or cloth to protect it from moisture. Now, reassemble your sprayer and store it in a cool, moisture-free, and dry place.

Conclusion

Kremlin Paint Gun is a durable and efficient machine that can proficiently handle both commercial and residential paint projects. Using it requires no training or qualification, tips and tricks would make you a pro painter.

It’s important to consult the manufacturers’ instructions before you assemble your gun, as well as when you adjust the settings of your gun according to your project. Happy painting with Kremlin!

How to Find the Best Spray Machine Repair Shop for Equipment

Posted 1 year ago
spray machine repair shop

Spray machines make up the most of many industries including manufacturing houses, painting contractors, and construction companies. The scope of the applications of sprayer machines is not limited to painting contracts and DIY ventures but plays a vital role in major units. To work effectively and proficiently, paint sprayer machines require maintenance and repairs. As overwhelming as it may sound, finding a spray machine repair shop is not much of a task. Stay with us, to know some of the best ways to find exclusive equipment, parts and the best repair shops in the locale.

Maintenance is the key to the longevity of the paint sprayer machines. As exclusive as they are in terms of efficacy and performance, sprayers require proper cleaning and maintenance to avoid recurrent repairs and unwanted replacements.

Although all the effort that you put into maintaining your sprayer can add up to its performance,

the fact that the wear and tear is a part of the life of any equipment, cannot be denied. At some point, your machine needs a visit to the repair shop to bring back its productivity and proficiency that is required of it.

Here is what to look for in the spray machine repair shops;

Look for Experience, but No Compromise on Expertise

Expertise and experience are equally crucial when looking for a professional repair shop. Always value the skills of experienced technicians, who are well aware of the task at hand. Repair shops with skilled technicians are not difficult to find, as their work speaks for them, and you’ll get a lot of referrals for them.

Another way to look for experts is to look into the business history of the repair shop. A repair shop that has been in the business for the greatest number of years has the most probability of coming up to your demands.

Visit them online before you Visit them in Person!

In the modern technology-driven world, it’s not difficult to find proficiency details of a business you are targeting. Looking for online reviews is a great way of knowing how good or bad the team you chose is at the repairing job.

Repair shops reviewed by satisfied customers in terms of service and experience should be your prime target. Positive reviews and details provided in the form of testimonials by past customers are your sign to give that repair shop a visit.  

The Customer Service says it All

Always opt for a sprayer repair shop that offers the best customer service. Only experienced and knowledgeable staff might be able to answer all your queries and clear any doubts that you might have.

The repair shop must be responsive on the platforms they have given for contact and customer interaction. It not only shows how serious they are about their business but also allows you to know if you made the right choice.

Apart from being knowledgeable and skilled in terms of their work, see how friendly they are towards the customers. It’s good to ask if they provide updates on your repair project or not. All these aspects help you in making the right choice, so do not overlook them.

Convenient Locations are a Big YES!

Always go for convenience when it comes to the location of the business you are hiring. Iit’s easy for you to pick and drop your sprayer machines for repairs, well and good. If the repair shop offers a pick-and-drop facility for your equipment, also great.

If both situations are inconvenient, it is time to look for a new repair shop because who wants the hassle of driving to a repair shop that is poles apart from your business? So, repair shops near your home or your business are a big yes, everything else is a big NO!

We do not Overlook Warranties

A warranty is basically a guarantee of the workmanship and the skills of the technicians. If your repair shop does not offer a warranty you will always be concerned about the repairs and the doubt that your machine is not repaired properly will never leave you.

So, it’s best to look for repair shops that offer a warranty for the services and repairs you availed from them. A repair shop with a warranty will always assure you that the equipment; used in the repairs is from trusted brands only and that you can trust them with your spray machine.

Although a warranty doesn’t decide the worth of a particular repair shop, it gives a sense of confidence and trust to the customers that their machine is in the right hands. In conclusion, all we’d say is; consideration is the key to finding the best spray machine repair shop in your vicinity. All of the above-listed factors are crucial in their way, so do not overlook any, or compromise on any of them. Your exclusive spray machine needs the best repair shop and nothing less!

Finding and Replacing Parts of Your Graco Gmax 2* 7900 Parts

Posted 1 year ago
Graco Gmax 2* 7900 Parts

Graco GMAX 2* 7900 is a powerful, efficient, and versatile airless paint sprayer that levels up your painting and accompanies you in the toughest painting jobs. The power and proficiency it offers. It is no doubt it make for big commercial projects as well as fits best for your residential painting ventures. Like all the machines we work with, Graco GMAX 2* 7900 parts requires both maintenance and occasional replacements. This blog aims at solving all of your queries regarding finding and replacing Graco GMAX 2* 7900 parts.

Maintenance is an important part of keeping the machine in its fully-functional form. A good maintenance routine eliminates regular replacements. An airless sprayer that is not maintain well leaves you with not only replacing parts, but ultimately the whole machine.

Maintenance no doubt, adds to the longevity of the machine, but the need for some occasional replacements of certain parts is, however, not eliminated. So, both maintaining and occasionally replacing the required parts is equally important to keep your genuine sprayer in its functional state.

Identifying the Parts is Necessary

Before you move on towards replacing the parts of your sprayer, it’s very important to first recognize and identify each part of your machine. Just like a doctor cannot proceed with the diagnosis without knowing the body well, you cannot make replacements without knowing the anatomy of your Graco paint sprayer.

Knowing the parts is pretty simple, you can either contact the manufacturer for a complete guide on the parts or you can search it on the web. Whatever the medium might be, make sure you recognize all the parts through the flow diagram before you open your machine to have a look.

How to find out what is damage in your sprayer? It might look quite overwhelming, but it’s pretty simple to find the damaged part, you just have to look carefully. The first sign of the damage may be wear and tear, you can easily identify it.

Next, you need to inspect your Graco GMAX for leakages, breakages, and cracks. The damage signs may be different for different parts, like; inspecting nozzles, tips, and filters for clogging, hoses for cracks and leakages, and wearing out for gaskets.

Inspect your machine for the slightest signs of change in performance. If your machine is not spraying at the speed it used to, or is taking more than usual to cover the surface with paint, it’s time you give it a good inspection.

How to Find Replacement Parts?

Graco is a well-known and reputable manufacturer of top-notch airless paint sprayers. They offer their services through different dealers and offer almost all kinds of parts. You can directly order Graco GMAX 2* 7900 parts directly from the website or from trusted dealers.

Make sure to provide the serial number and model number of your airless paint sprayer when ordering parts, so you only receive parts that are compatible with your machine. To ensure the best performance, longevity, and original proficiency of your machine. It’s highly recommended to use original Graco parts only.

Replacing Graco GMAX 2* 7900 Parts

Although replacing parts of your Graco sprayer is pretty simple, it does require basic mechanical knowledge and skills to install the parts in your machine properly.

Start by turning your Graco GMAX paint sprayer off and detaching the gun from the system. It’s highly recommended to wear protective gear, including eye protection goggles, and gloves to stay protected from harmful chemicals that might come in contact with you during the process.

Let’s get to know some of the commonly and occasionally replaced parts of the airless paint sprayers;

Filters

Filters protect the machine from dirt and debris. It prevents dirt from entering the system and usually gets clogged with regular usage of the sprayer. Therefore, it needs a replacement every now and then. To replace it, locate its location from the diagram, lose the fitting, replace the filter and tighten the fitting and it’s done.

Hose

The hose gets cracked and subsequently starts leaking, wasting the paint as a result. Installing a new hose is pretty easy detach it from both ends (spraying gun and pump), attach the new hose, and tightens the fittings using a wrench.

Nozzle or Tip of the Gun

Before you start replacing your sprayer’s nozzle or tip, it’s important to find the right match, made exactly for your model. Not using a compatible tip can make it nearly impossible to spray with your machine.

Replace your tip by detaching the old one and carefully installing the compatible tip into your gun. Tighten the fittings with the help of a wrench.

Finding and replacing your Graco GMAX 2* 7900 parts is not a difficult task. You just need to know the simple anatomy of your machine, find compatible parts from trusted manufacturers, and ultimately carefully replace the old damaged and worn-out parts with new ones. It’s that simple!