Importance of Piston Rod on a Graco Paint Sprayer

Posted 4 months ago

Importance of Piston Rod on a Graco Paint Sprayer

The Piston Rod is a crucial component of Graco pumps. It connects to the motor via a connecting rod and moves up and down with the action of the motor, transferring the motor’s power and motion to the pump by moving the internal components of the pump. The Piston Rod is responsible for displacing fluid out of the pump during both the upstroke and downstroke. In the upstroke, it creates a vacuum or suction that draws in the fluid or paint from the suction hose and the same time it is displacing fluid out of the pump. The down stroke serves as opportunity to allow already drawn in paint to get to the fluid displacement chamber. This results in continuous flow of paint or liquid being pumped.

Do Graco Piston or Displacement Rods Wear?

Piston Rod also called Displacement Rod is so vital in Graco Pump that there will be no Graco Piston Pump without the Piston Rod. Piston Pods wear out as they get used. It is very important to make sure your Piston Rod is not worn, as a worn Piston or Displacement Rod will result in non-working or inefficient pump and resulting in a non-working paint sprayer. While inspecting your Piston also check your Piston Valve, Repacking kits, Intake and Outlet Balls, Carbides, and Cylinder for wear. Together they make a good functional pump.

How can you tell a worn Graco Piston Rod?

A good Piston Rod should be smooth and have no deep grooved marks. It should not be abrasive or rough. Most Piston Rods should be Chromex plated, and the plating should not be broken or chipped. The internal threads should be in good thread able state and not cross threaded.  There should be no trash or residue insides the piston rod as it could get the outlet ball stuck resulting in Pump failure.

Repacking Titan 805-236A Fluid section assembly for Titan 840 and 740
Posted 4 months ago

Repacking Titan 805-236A Fluid section assembly for Titan 840 and 740


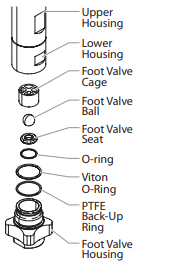
Begin by removing the foot valve assembly and the lower housing.  By following these procedures:

  1. Loosen and remove the foot valve housing from the lower housing.
  2. Clean out any debris in the foot valve housing and examine the housing and the foot valve seat. If the seat is damaged, reverse or replace the seat.
  3. Using two wrenches, hold the upper housing at the wrench flats with one wrench and loosen the lower housing with the other. Remove the lower housing.
  4. Using a 3/8” wrench, loosen and remove the outlet valve retainer from the piston rod.
Please note that the outlet valve does not require disassembly from the piston rod during this procedure.

Rotate the fluid section counterclockwise to detach it from the gearbox housing.

Secure the upper housing upright in a vise, taking care not to over-tighten to prevent damage.

Utilizing a wrench, remove the upper seal retainer.

Slide the piston rod forward until the piston is out of the T-slot on the slider assembly.

Extract the Titan 805-437A Piston rod through the bottom of the upper housing.

Inspect the piston rod for wear and replace if necessary.

Remove the upper and lower packings from the upper housing, being careful not to damage the upper housing during the process.

Reassembly of the Parts

Clean the upper housing and inspect it for damage, replacing if needed.

Unwrap the upper packing and preform tool, using scissors to cut the plastic wrap (avoid using a utility knife to prevent damage to O-rings).

Slide the upper packing off the sizing/insertion tool towards the tip and install it into the top of the upper housing with the raised lip on the packing facing down.

Insert the spacer on top of the upper packing.

Thread the upper seal retainer into the upper housing and torque it to 25-30 ft. lbs.

Pre-form the lower packing using the lower packing sizing tool included in the repacking kit.

Install the lower packing with the side containing the O-ring closest to the face of the packing facing up.

Partially insert the lower packing into the bottom of the upper housing so that the O-ring side faces up.

Use the lower packing insertion tool to push the lower packing into position.

Place the piston insertion tool over the top of the piston rod.

Insert the piston rod into the bottom of the upper housing, through the lower packing, upper packing, and out through the upper seal retainer.

Ensure the raised lip on the bottom of the lower packing is fully outside the packing around the piston rod after insertion.

Remove the piston insertion tool from the top of the piston rod.

Slide the top of the piston rod into the T-slot on the slider assembly.

Turn the knock-off nut counterclockwise until it is flush against the upper housing.

Lubricate the threads on the upper housing with anti-seize compound, remove the upper housing from the vise, and thread it into the gearbox housing clockwise.

Continue turning the upper housing clockwise until the knock-off nut is flush against the gearbox housing.

If the nipple on the upper housing does not face the back of the unit, turn the upper housing counterclockwise until it does, avoiding more than one full turn.

Once the nipple is in position, turn the knock-off nut clockwise until it contacts the gearbox housing.

Tap the knock-off nut with a soft hammer to tighten it against the gearbox housing.

Ensure the Viton O-ring and PTFE back-up ring are lubricated and in place, then thread the lower housing into the upper housing. Use two wrenches to hold the upper housing at the wrench flats and tighten the lower housing.

Attach the high-pressure hose to the nipple on the back of the housing and tighten it with a wrench, avoiding kinking the hose.

For low rider units, ensure the hose does not touch the cart frame. If it does, reposition the nipple by turning the upper housing until the hose is clear of the frame, and the nipple is within 45º of the back of the unit.

Ensure the Viton O-ring and PTFE back-up ring are lubricated and in place, reassemble the foot valve assembly, and thread it into the lower housing securely.

Thread the siphon tube/siphon set into the foot valve and tighten it securely. Remember to wrap the threads on the down tube/siphon tube adapter with PTFE tape before assembly.

Replace the return hose into the clamp on the siphon tube.

Place the front cover on the gearbox housing and secure it in position using the four front cover screws.

Turn on the sprayer by following the procedure in the appropriate procedure and check for leaks.

Please note that a repacking kit with part number Titan 805-1010 Pump Repair Kit is available for this process.


Top Signs Your Graco Contractor Gun Needs a Rebuilt Kit

Posted 8 months ago
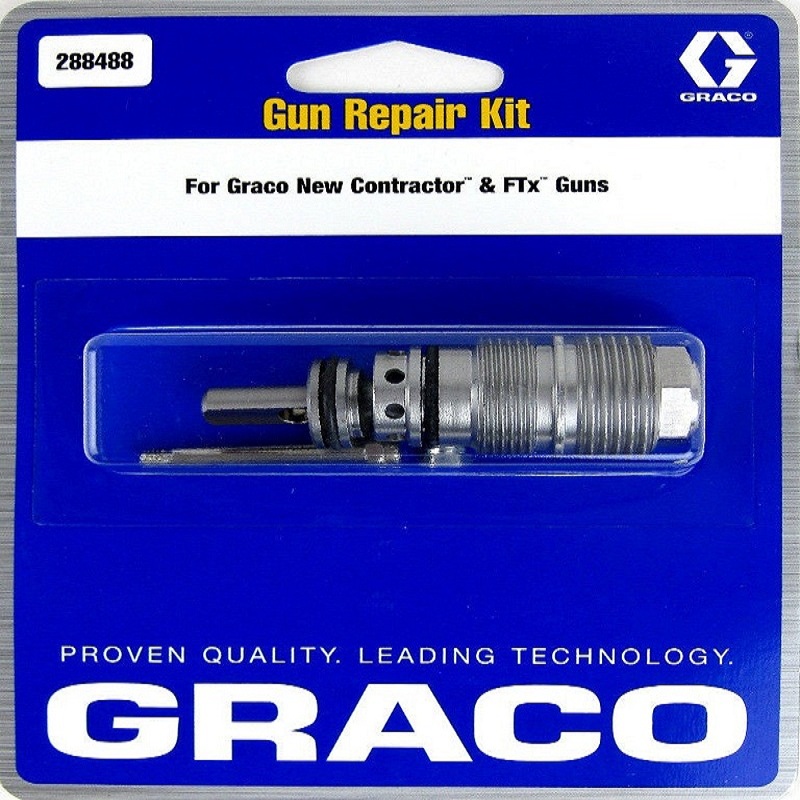
Graco Contractor gun rebuilt kit

Graco guns have long been in the field, recognized for their durability, efficiency, and performance. The ease of use and proficiency has made them a top-notch choice for enthusiasts and professionals alike. Tools make up most of your painting projects. Sprayer guns are without a doubt, the best tool in the painters’ arsenal. Although Graco contractor guns are a popular choice among professionals, the fact that they are machines cannot be denied. Another undeniable fact is that a piece of machinery requires maintenance, repairs, and replacements. One of the key aspects of the maintenance routine is; when to rebuild or replace certain parts of your machine. As a Graco gun owner, you might have heard about the Graco Contractor gun rebuilt kit, but have you wondered what it is?

In this blog post, we will discuss how to know when your Graco contractor gun needs a rebuilt kit. All the signs that you need to look into are given below, let’s get started;

Inconsistent Spray Patterns

Consistent paint spray is an important part of spray painting. Both professionals and DIY ventures are looking for a uniform and consistent finish on the surface. If you start noticing inconsistent spraying patterns, it might be your sign to look for wear and tear in nozzles, and/or needles.

Rebuilt kits can restore these components for you, and bring your sprayer back to its prime condition. Rebuilt kits, therefore, are crucial to professional painters, who cannot compromise on the consistency of the spray pattern.

Leakage of Paint

An obvious sign of wear out is painting leaking from places, it should not. It is your sign to check out your sprayer to rule out which part is playing the culprit. Whether it is the nozzle or any other part, leakages can be irritating as well as costly.

A lot of paint is wasted, which costs you more bucks than you’ll actually need to get yourself a rebuilt kit. Also, who wants a messy workplace? No one I guess, so, a rebuilt kit is the rescue and one must turn to it before it gets really messy.

Difficulty in Trigger Action

Your trigger can rule out the wear-out better than anything else. If you don’t feel that springy pushback, or if it’s harder to press the trigger, it’s your sign to look into your sprayer. The spring back of the sprayer guns usually wears out with continuous use and must be replaced, therefore.

Rebuilt kits can solve your problem of trigger-action. You can enjoy the smooth spring-back trigger action and preserve the efficiency of your sprayer.

Reduced Spray Pressure

Time is of prime importance in professional and contractor painting projects. If you cannot benefit from the time-saving nature of your sprayer, why even buy it in the first place? if you notice that paint is not coming with the force that it used to, it’s an indication of reduced pressure.

Reduced spraying pressure can be a result of internal wear and tear, as well as, clogging. Rebuilt kits can restore the optimal spraying pressure of your sprayer to maintain its performance and efficiency.

Unusual Noises

Unusual noises from within your sprayer are a great indication of inside wearing out. Any hissing sounds or squeaks that you may hear while painting is a clear indication of internal damage. Furthermore, they can be indicative of air leaks from the sprayer, as well as wear out.

It’s crucial to attend to these unusual noises and address the issues ASAP. This will not only maintain the durability but the performance of your sprayer.

Increased Paint Consumption

If you find yourself using more paint for the same job, it might be your next sign. Over time, the sprayers lose their efficiency either due to insufficient maintenance or internal damage. Graco guns are pretty competent when it comes to efficiency and less paint consumption.

But if the same guns use more paint than usual, it’s indicative of the damages you must attend to. Rebuilt kits not only work out this issue but bring back the efficiency you are used to.

Frequent Clogging

Competent machines like Graco don’t usually get clogged. The manufacturing is designed specifically to reduce this, to ensure superior performance. On the contrary, if your Graco gun is subjected to frequent clogging, it’s your gun’s indication of internal damage within it.

Over time, with overuse, or with insufficient cleaning routine; your Graco gun becomes prone to internal wearing out. Frequent inspections, careful maintenance, and replacements from the rebuilt kits can help you solve the issue at hand.

Conclusion

Graco is an elite brand in the paint sprayer market. Yet, Graco guns attract all the attention that a machine requires. Proper cleaning, maintenance, and frequent replacements are essential to keep your gun in shape.

Regular inspections allow timely intervention and can help you in maintaining the prime condition of your gun. investing in a rebuilt kit is not just about repairing your Graco guns, it’s about restoring your machine’s superior performance!

AMSPRAY PAINT SPRAYERS FOR PROFESSIONAL USE

Posted 8 months ago
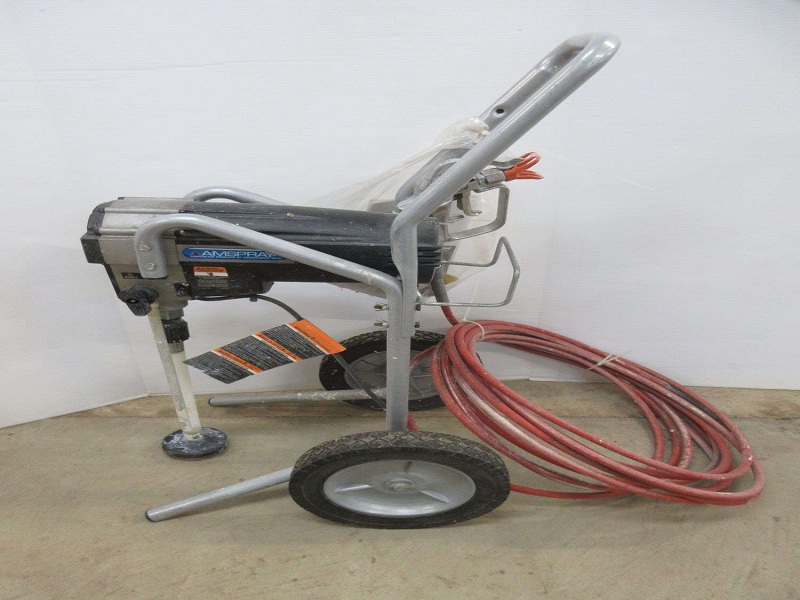
AmSpray paint sprayers

Efficiency, quality finish, and precision are touchstones of successful painting projects. Over the years, the painting industry has shifted to innovation. Innovative tools and equipment elevate the proficiency and standard of the work. Tools have thus, become important to achieve impeccable results. Among these tools, AmSpray paint sprayers have become the go-to choice of professionals. These sprayers offer all the features required for a professional-grade paint sprayer. The efficiency, precision, and quality of the finish make them a leading brand for sprayers.

In this blog, we will delve into the world of AmSpray paint sprayers. Let’s see what makes them an ideal choice for the pros in the industry.

What are AmSpray Paint Sprayers?

AmSpray paint sprayers are powerful machines. This unmatched power to atomize the paint particles at a higher pressure leaves a very fine and even layer of paint on the surface. Unlike the traditional methods of painting, where brushes and rollers were used, paint sprayers are far more efficient and time-saving.  Paint sprayers offer smooth and uniform application giving intricate details to your finishes.

Why Choose AmSpray for Professional Use?

Precision and Quality

The hallmark of professional painting is precision and quality finishes. AmSpray add details to your finishes leaving smooth and fine paint application on the surfaces. The precise application results in fewer drips, runs, and splotches, ensuring a finish that impresses the clients.

Efficiency and Speed

In the professional painting world, time is money. AmSpray offers a much faster application of paint than the brushes and rollers. The efficiency of the machine depends on its speed, the shorter the timeframe, the more efficient is the machine. Increased Efficiency ultimately results in increased revenue in a shorter timeframe.

Versatility

Every professional painter is looking for versatility, when on search for a pro paint sprayer. AmSpray can handle multiple paint materials, and you do not have to buy separate sprayers for your different projects. From thin stains to latex, it proficiently atomizes thick and thin materials through the nozzle onto the surface. Versatility ensures professionals require fewer tools and can do a wide variety of projects.

Reduced Waste

Traditional methods of painting; brushes and rollers, wasted a lot of paint in the painting process. AmSpray paint sprayers atomize the paint particles directly onto the surface, and therefore, limit material wastage.

Features that Set AmSpray Apart

Adjustable Pressure Controls

Customizable pressure also adds to the versatility of the sprayer. Different projects require different levels of pressure. AmSpray offers adjustable pressure controls so, that professionals can tweak the pressure settings as per the demand.

Easy Maintenance and Cleaning

AmSpray paint sprayers are designed with professionals in mind. Therefore, they are easy to disassemble and easy to clean.

Durable Construction

Professionals in the painting industry have rigorous demands, so their tools must be durable. AmSpray paint sprayers are made with high-quality materials. These sprayers are built to last as well as, can withstand daily use by professionals.

Ergonomic Design

Long hours of painting can be quite strenuous for the painters. AmSpray paint sprayers’ ergonomic design ensures that the machine is comfortable to hold. This reduces the fatiguing process and painters can comfortably paint for long hours without straining their hands.

Tips for using AmSpray Paint Sprayers Professionally

Proper Preparation

Before you set on your painting venture, make sure the area/surface is well-prepped. Cover all the surfaces that you do not want to be painted. Preparation before you start painting ensures a clean job. It also minimizes the after-clean-up time.

Practice

If you are new to painting, or AmSpray painting, you must spend some time practicing. You can practice on scrap materials and cardboard. This helps you in understanding the nature and functioning of the sprayer. It also aids you in tuning the sprayer as per the requirement of the task at hand.

Consistent Motion

Professionals are well aware of this technique. If you are new, you should also work on this part. Consistency in the motion of the sprayer brings smoothness and quality to your finishes. Remember, it’s all in the technique.

Regular Maintenance and Cleaning

Cleaning the sprayer thoroughly after every use is the key to adding longevity to the lifespan of your sprayer. This prevents paint build-up in the sprayer and ensures that the superior quality of your sprayer is preserved.

Final Thoughts

The right tools and equipment can make all the difference in the dynamic world of painting. AmSpray paint sprayers with the blend of precision, versatility, high-quality performance, and efficiency are a testament to this fact.AmSpray is not just a tool in the painting industry. By choosing it, the professionals are trusted partner that promises exceptional results on every use. AmSpray paint sprayers will always pay off in efficiency, quality, and client satisfaction.With enhanced proficiency, the AmSpray paint sprayer is a win-win game for professionals and contractors in the painting industry. It not only offers superior results but also is a time-saving machine.