Tips and Tricks for Using Paint Sprayers Repair 

Posted 1 year ago
Paint sprayer repair

There are a lot of times that we have discussed the qualities of the sprayers and their parts. We have also talked about what the sprayers can do and what they cannot do. One thing that we do not really talk about is the tricks that you need to use while spraying. It does not matter if you have the best sprayer in the world or not, but if you are not using the right techniques it will all go in vain. Having said all of that, we would like to mention some of the tips and tricks that you need to look into when you are spraying. Just like the Paint sprayer repair is necessary to do for a good spraying experience, you also need to learn and follow the right techniques too.

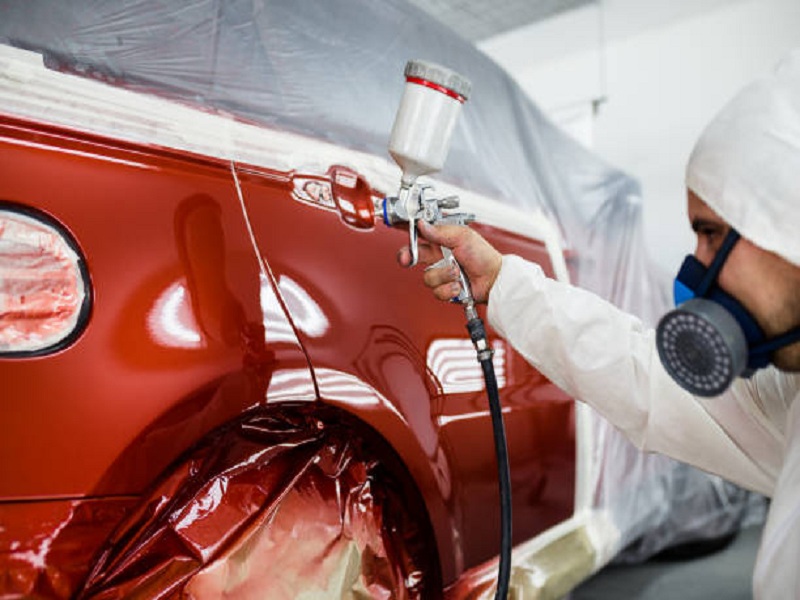
Look into the safety part:

The first and most important thing that we overlook is our own safety when we are spraying. The procedure of spraying sure is really easy to do and does not take much time but it does not mean you should overlook this. When you are starting to spray, wear your safety goggles, with a respiratory mask, to protect yourself from breathing issues. Also, wear coats that have long sleeves, and wear long boots so the paint is not all over the place, and you.

Always spray test before actual spraying:

The second step that we think everybody needs to follow again is testing the spray on some cards before you actually start spraying. Now, what happens is that the user thinks they have prepared everything, now they should start spraying. This way the paint on the wall with the first coat goes really thick or thin which ruins it all. When you are starting to paint, always make sure that you spray on the card first. This way, you will know if the color is fine and if the thickness of +coat is fine or not.

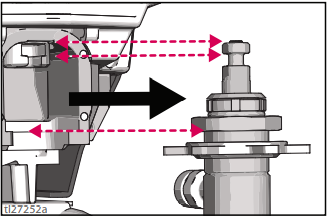
Tip and filter size:

The next thing that should be mentioned in this list is about choosing the right tip size and the right filter size. When you are spraying choosing the right size of the nozzle, and filter of the gun is really important. If you want to get the right and perfect results then you surely need to look into this. When the diameter of the nozzle is right, the flow of paint is also right. When you are choosing the filter making the right choice is important for the material that you are using. If the material that you are using is viscous then your filter should always be coarser.

Corners and edges before any other space:

The point that we are going to mention now is something that you might already know, or might not. Well, we are going to talk about the most unpopular opinion which is painting the edges before any other large area. If you are wondering why it should be so, don’t worry we will explain that too. When you are painting the edges before the large surfaces then you have more chances of getting even paint. If you cannot do this then start spraying in the cross-coat pattern so that you achieve better coverage on the surface.

Why not use the extensions:

You are legitimately looking at the 60’s if you still do not know what the extensions are and how they are used. Nozzle extensions sure are something that has made the life of users so much easier and more convenient. Just as, in the old time people used to use staircases to reach places that are hard to reach, now, you can use extensions and get the work done. The extensions are ranging in sizes anywhere between 15 to 60 cm. you will not need to use any ladders to get to the places you want. This is the technique for easy coating of all the places that are out of your reach.

Move before you spray:

The last technique that we are going to be sharing with you is again a fun one that you might not know of. It is to move the sprayer before you actually start spraying because it is going to help you a lot. Sometimes when you are spraying you tend to press the button first and then the spray double coats the surface. To get rid of this problem, you can just move the sprayer to the place that you want to paint, before pressing the button, and this way you will get to paint evenly throughout the surface. These are all the techniques that you need to follow if you want to paint evenly and get the best results. We are sure these are going to help you a lot without getting into much trouble.

What are Some Wagner Paint Sprayer Parts?

Posted 1 year ago
Wagner paint sprayer parts

We have been seeing a lot of companies that are selling amazing sprayers, and some amazing sprayer parts and we know they have been doing well. Some companies focus only on the sprayers while others focus on sprayer parts.In this article, we are going to be talking about the sprayer parts of the Wagner paint sprayer parts, and we will see what the qualities that they come with are. We will mention everything that we can for you to know and understand.

Wagner Spray Tip:

The first Wagner paint sprayer part that we are going to be mentioning is the Wagner spray tip. These tips sure are the most amazing and they come up with all the top-notch qualities.

The brand that is used is the Wagner spray tech and it comes in the color green. The material that they are made with is carbide, and it weighs about 0.03 pounds.

Talking about the qualities of these spray tips, including them being 10 to 12 inches in size which means that you can easily spray all the large parts like fences, desks, sidings, etc. These are the tips that can easily be used with the control max paint sprayers and the Wagner control pro sprayers.

When you are using the tips, there are a few materials that go perfectly with them. These are extremely perfect when they are being used with primers, oil paints, solid stains, etc. the best part about getting your hands on these sprayers is that it removes the clog very quickly, and you can easily get the spraying procedure started by turning the tip of the spray.

These spray tips also use amazing technology which helps you in the reduction of spraying that also up to 55%. With that, the spray tip is also able to spray a very soft coat that does not look dirty or too much. This spray tip also improves your control of the paint sprayer and gives you a very consistent and fine finish.

If you get your hands on these Wagner paint sprayer parts then you will also be able to see some really good results.

Wagner Front-End Kit:

The second part of the Wagner paint sprayer parts that we are going to be talking about is the Wagner front-end kit. This kit comes with quite a nozzle product and we will mention all the detail below.

The first part that comes in this kit is the front-end nozzle. This nozzle is able to give you an extremely smooth finish without any marks from the brush. When you are working on projects like cabinets, trim, etc then this product will act as your best friend. Now, you must be thinking about where the nozzle can be used, so we have an answer to that too. the nozzle can perfectly be paired with all the HVLP sprayers and the paint-ready sprayers.

This is the nozzle that cannot only fit with the sprayer but can also give you the perfect coatings too. talking about the materials that it can be used with, there are quite a few. you can use this nozzle for all thin materials. When you are using some oil-based materials, or water materials, like sealers, etc. then you can surely use this nozzle. You might as well need to do some thinning for all the thick materials.

The best part about having this front nozzle is that it also comes with adjustable pattern settings. It comes with a flow control that is completely adjustable so that you get the précised results.

This means that you can easily adjust it according to your speed, and the technique that you use. The other best thing about having this in your kit is that you can spray in all different patterns. It comes with three patterns that include horizontal, vertical, and round patterns so that you can easily spray in all directions.

Final Words:

The last thing that we would like to mention about this is that it also does not cause you any trouble. This is really easy to be assembled with your paint sprayer. This comes with a lock-and-go technology which basically makes it really easy to use. You can change the front end so that you can also change colors and also disassemble it when your work is done.

To sum all of it up, we will say that it is very easy to use and with that, it can also be cleaned conveniently. It also comes with suction power and the money that you will spend on it would surely be worth it. Once you get it you would never have to look back. You can also get this from a different website and use it, then share your user experience with the company.

How to remove Graco 390 PC Pump and other PC Pumps

Posted 3 years ago


To remove Pump from a Graco 390 PC or other PC Models, you will simply be disconnecting the fluid Outlet and inlet and remove the pump.  Here are steps by step procedure

1

Loosen the retaining nut with a hammer .

2

To free the pump rod cover, continue to loosen the retaining nut.


3

Open the pump rod cover by lifting or swinging it out.


4

Remove the suction hose from pump and disconnect the outlet hose see image below.

5

Slide out the pump from housing.